Jenkins and webpack

Many Jenkins plugins don’t use modern UI features, it's normally a trial and error process on how to get this working right without a lot of documentation on it.
Webpack is a module bundler which makes it easy to consumer and process libraries.
Some use-cases for using webpack with Jenkins:
- PostCSS so you can polyfill that CSS feature that IE 11 or Safari
don’t support - Babel to allow you to use more modern JavaScript syntax than is
supported in your targeted browsers - Including JavaScript libraries
Keep in mind the Jenkins supported browsers when configuring the above tools.
Tools required
npm and node are not strictly required as maven will download them but it's easier if you have them installed locally as well.
Outcome
At the end of this tutorial you will have a Jenkins plugin that is loading a JavaScript file compiled by webpack.
Creating the plugin
The recommended way to start a new Jenkins plugin is to use a maven
archetype from jenkinsci/archetypes.
They come with an up-to date pom.xml file, a Jenkinsfile and other
useful files.
It’s best to clone the archetypes repo and build it, as they aren’t released very often but the master branch is kept up-to date.
git clone https://github.com/jenkinsci/archetypes.git
cd archetypes/
mvn clean install -DskipTests --no-transfer-progress
Now we need to select the archetype we want to use:
mvn archetype:generate -Dfilter=io.jenkins.archetypes:

#Choose archetype:
#1: remote -> io.jenkins.archetypes:empty-plugin (Skeleton of a Jenkins plugin with a POM and an empty source tree.)
#2: remote -> io.jenkins.archetypes:global-configuration-plugin (Skeleton of a Jenkins plugin with a POM and an example piece of global configuration.)
#3: remote -> io.jenkins.archetypes:global-shared-library (Uses the Jenkins Pipeline Unit mock library to test the usage of a Global Shared Library)
#4: remote -> io.jenkins.archetypes:hello-world-plugin (Skeleton of a Jenkins plugin with a POM and an example build step.)
#5: remote -> io.jenkins.archetypes:scripted-pipeline (Uses the Jenkins Pipeline Unit mock library to test the logic inside a Pipeline script.)
#Choose a number or apply filter (format: [groupId:]artifactId, case sensitive contains): : 1

# press 1 for empty-plugin

# Choose io.jenkins.archetypes:empty-plugin version:
#1: 1.0
#2: 1.1
#3: 1.2
#4: 1.3
#6: 1.5
#5: 1.4
#7: 1.6
#8: 1.7
#9: 1.8
#10: 1.9
#11: 1.10-SNAPSHOT

# Choose a number: 11:

## Just press enter to take the last version

# Define value for property 'artifactId':

## This is the name of your plugin, do not include plugin in the name

## we will use webpack-sample

## You can accept the default version

# Press Y to confirm
You should now have a folder called webpack-sample in the directory that you ran the archetype:generate command.
Congratulations you’ve now scaffolded your Jenkins plugin.
Let’s build it now
Adding webpack
Now we need to create a JavaScript project inside of our plugin.
npm init
For this tutorial you can just press enter for all the options thatnpm init prompts you for. Type yes to confirm.
Next install the webpack package:
npm install --save-dev webpack@5 source-map-loader webpack-cli@4
The Jenkins plugin pom comes pre-configured with the frontend-maven-plugin to make it easier to integrate frontend assets and build tools to Jenkins plugins.
We just need to add a bit of configuration.
Create a file called mvn_exec_node, this is a marker file that
activates that frontend-maven-plugin in the Jenkins plugin pom.
touch .mvn_exec_node
Add the Node.JS and npm versions to the properties section inpom.xml
Note: add these to the existing properties don’t create a new section.
<properties>
    <node.version>16.7.0</node.version>
    <npm.version>7.20.3</npm.version>
</properties>
Add the scripts that implement the hooks in the frontend-maven-plugin:
Note: the test script has been modified to exit 0 as we won’t be adding
tests in this tutorial
{
  "scripts": {
    "mvnbuild": "npm run build",
    "mvntest": "npm run test",
    "build": "webpack --mode production",
    "build:dev": "webpack --mode development --watch",
    "test": "echo \"Error: no test specified\" && exit 0"
  }
}
Now let’s create the file that we want webpack to process:
mkdir -p src/main/frontend
echo 'document.getElementById("webpack-sample").innerText = "Hello from webpack"' > src/main/frontend/index.js

# Add frontend build files to ignore
echo '# frontend build output' >> .gitignore
echo 'src/main/webapp/js' >> .gitignore
echo 'node_modules/' >> .gitignore
It’s time to create the webpack file, there’s lots you can do with
webpack, this tutorial will just keep it simple though:
Create a file called webpack.config.js:
const path = require('path');

module.exports = {
  entry: './src/main/frontend',
  // enable source maps for debugging webpack output
  devtool: 'source-map',
  module: {
    rules: [
      {
        test: /\.js$/,
        enforce: 'pre',
        loader: 'source-map-loader',
      },
    ],
  },
  output: {
    filename: 'bundle.js',
    path: path.resolve(__dirname, 'src/main/webapp/js'),
  },
};
Create a page to attach the JavaScript bundle too
Now we need to add our JavaScript bundle somewhere and see that it’s
loaded.
For this tutorial we’ll create a standalone page.
First we’ll need a package to store the Java source file in.
# create a package for your plugin normally using the artifact ID
mkdir src/main/java/io/jenkins/plugins/webpacksample
mkdir -p src/main/resources/io/jenkins/plugins/webpacksample
We will use the RootAction extension point to add a page to Jenkins.
Create a file called SampleRootAction.java in thesrc/main/java/io/jenkins/plugins/webpacksample directory:
package io.jenkins.plugins.webpacksample;

import hudson.Extension;
import hudson.model.RootAction;

@Extension
public class SampleRootAction implements RootAction {
    @Override
    public String getIconFileName() {
        return null;
    }

    @Override
    public String getDisplayName() {
        return null;
    }

    @Override
    public String getUrlName() {
        return "sample-action";
    }
}
Now we need to define the view, the main view engine in Jenkins is
jelly.
Create a file called hello.jelly in thesrc/main/resources/io/jenkins/plugins/webpacksample directory:
<?jelly escape-by-default='true'?>
<j:jelly xmlns:j="jelly:core" xmlns:l="/lib/layout" >
    <l:layout title="${%Webpack sample}">
        <l:side-panel/>
        <l:main-panel>
            <h1 id="webpack-sample"/>
        </l:main-panel>

    </l:layout>
</j:jelly>
Test it out
That should be all we need, let’s see if it works.
The maven-hpi-plugin which is configured in the parent pom includes a development server we can use for testing this:
mvn hpi:run -P quick-build
If it starts fine you should see:
2021-08-23 10:58:32.674+0000 [id=31] INFO hudson.WebAppMain$3#run: Jenkins is fully up and running
Scroll up a bit in the console output, you will find the link that Jenkins is running on:
[INFO] Configuring Jetty for project: TODO Plugin
[INFO] Try setting -DwildcardDNS=nip.io in a profile
[INFO] ===========> Browse to: http://localhost:8080/jenkins/
You can pass a different port on the command line if 8080 is already
taken: -Dport=8085.
In your browser open the action we created:
http://localhost:8080/jenkins/sample-action/hello
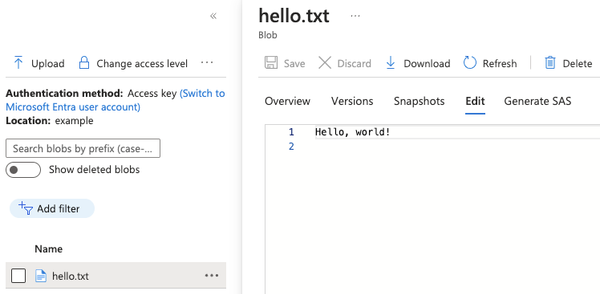
You should see on your screen:
Hello from webpack
Thanks for reading, I hope this is useful. Let me know about any issues
on GitHub.