Searching a static web site with Azure AI Search and semantic search - part 2
Learn how to upload a static site to an Azure Storage account and search it with Azure AI Search

Azure AI Search (previously Azure Cognitive Search) is a powerful search engine that provides full text search amongst other features.
In this blog post we'll go through:
- Extracting static pages and processing them
- Uploading the static pages to a storage account
- Indexing the static pages in Azure AI search
- Searching the pages
In the previous blog post Searching a static web site with Azure AI Search and semantic search - part 1 we setup all the resources that will be required for this blog post so make sure you take a look at that first.
Example static website
For this we'll be using the example mkdocs getting starter guide, but you can use any site as long as it produces static HTML.
Follow the above guide, or you can skip ahead and use my Git repository, I've also checked in the static HTML files so you don't need to install Python or mkdocs.
 timja
timjaProcessing the static site
I'm not sure if this is essential but I had some content on my static site that I wanted removed so it wouldn't accidentally show up in the search, I used this as an opportunity to drop the navigation links to avoid any risk of that confusing the search.
I used a tool called htmlq which is described as like jq but for HTML, you use CSS selectors to extract HTML.
Install the tool, or download it from their GitHub releases page.
We want to extract a couple of parts of the HTML file:
- the main content
- the page heading - so that we can set it as an attribute in the index
To get the main content:
$ cat site/about/index.html | htmlq 'div[role=main]'

<div class="document" itemscope="itemscope" itemtype="http://schema.org/Article" role="main">
  <div class="section" itemprop="articleBody">
   ...
  </div>
</div>
extract-main.sh
To get the page heading:
$ cat site/about/index.html | htmlq --text 'h1'
Audiat ista subduci fata
extract-title.sh
I tried loading the extracted document into Azure Blob Storage and then running the indexer. I found that the automatic HTML extraction into text no longer worked after I extracted content. On a hunch I edited the file to add the <html> element around the extracted content and then it worked again.
I thought about reinserting html tags but htmlq has an argument --text which strips all the HTML out, I tested it out and it seemed to do just as good a job as the Azure extraction functionality did so I just went with that instead:
$ cat about/index.html | htmlq --text 'div[role=main]'
Audiat ista subduci fata
Ingreditur post
Lorem markdownum calentibus greges gemina, omnia ponti usum petebam illis mixta.
Summum laqueoque ille lacrimas mea laevam terrore, tibi huius ab vidit
terrigenasque fecit; quem nigris. Enim nec: si trunco successibus, longis,
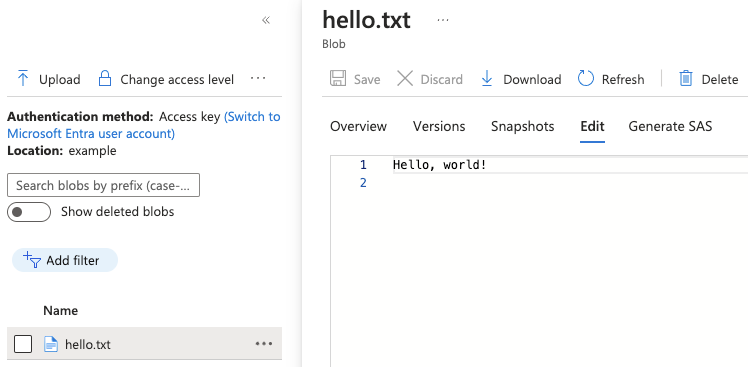
...Uploading the files
We'll use azcopy for this, if you want to automate this fully end 2 end then take a look at my earlier blog Using azcopy in GitHub actions with federated credentials.
We'll also do a a second run over the files to set the 'title' metadata attribute to the page heading. If anyone knows a better way of doing this then let me know in the comments:
#!/usr/bin/env bash
azcopy login

export STORAGE_ACCOUNT_NAME=example
export CONTAINER_NAME=example

azcopy sync --compare-hash=md5 \
  --delete-destination=true \
  --include-pattern="*.html"  \
  "site/" "https://$STORAGE_ACCOUNT_NAME.blob.core.windows.net/$CONTAINER_NAME/"

function setTitle() {
    local path=$1

    TITLE=$(cat $path | htmlq 'h1' --text)

    echo "Setting title to $TITLE for $path"

    az storage blob metadata update \
      --auth-mode login \
      --account-name $STORAGE_ACCOUNT_NAME \
      --container-name $CONTAINER_NAME \
      --name $path \
      --metadata title="$TITLE"
}

# so that it's available to the -exec in the find command
export -f setTitle

pushd site
# another pass over to set the file title as a metadata attribute
find . -name "*.html" -exec bash -c "setTitle \"{}\"" \;
upload-files.sh
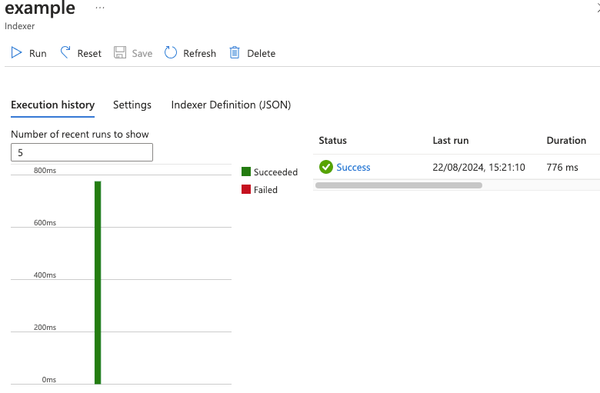
Once we've uploaded the files we'll want to trigger the index:
#!/usr/bin/env bash
set -e

export SEARCH_SERVICE_NAME=example
export SEARCH_RESOURCE_GROUP=example

API_KEY=$(az search admin-key show \
  --service-name $SEARCH_SERVICE_NAME \
  --resource-group $SEARCH_RESOURCE_GROUP \
  --query primaryKey \
  -o tsv)

curl --fail-with-body \
  -X POST \
  -H "api-key: ${API_KEY}" \
  "https://$SEARCH_SERVICE_NAME.search.windows.net/indexers('example')/search.run?api-version=2024-07-01" \
  -d ''

echo "Index triggered"
trigger-index.sh
You can also trigger it in the UI, but if you want to automate it then you can use the above script.

Running searches in the Portal
Now we're going to test out searching in the portal.
Navigate to your AI Search resource in the portal.
Click on 'Indexes'
Click on 'example'
You'll now be on a search page.
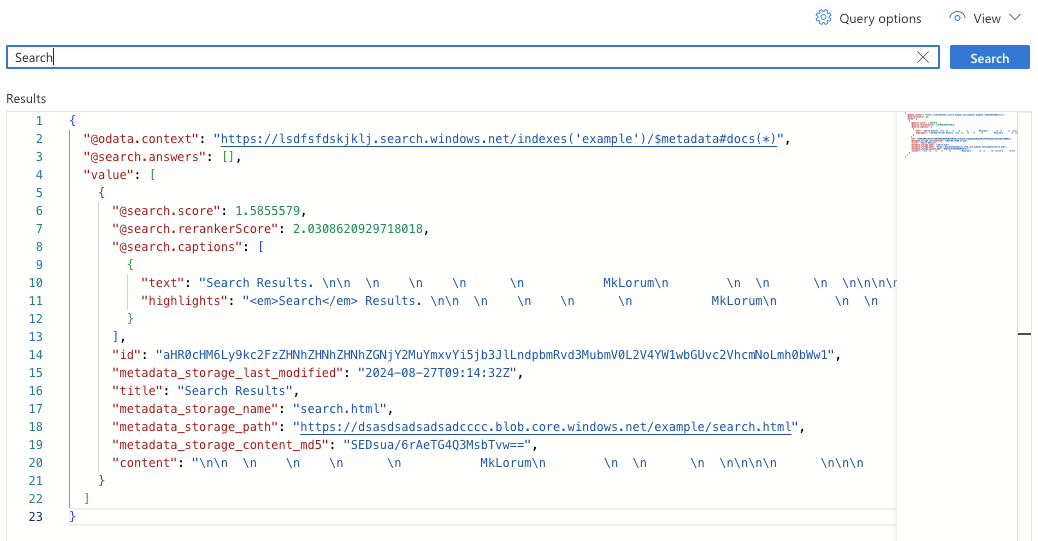
We've got a few pages to choose from to look for results. Enter the text 'Search' and then click the 'Search' button.

There's a few interesting attributes in the result.
@search.captions.highlights- contains processed results that you can display to a user and it highlights where the search terms were matched.title- the page heading that we stored as an attribute on the file earlier.metadata_storage_page- can be used in code to reconstruct what the URL should be on the static site if you want to be able to link the user to the rendered page.@search.rerankerScore- the AI part, it is the semantic scoring based on the understanding of the language, higher is better.
I hope this was useful to someone. For a complete example see my GitHub repository: https://github.com/timja/blog-ai-search-part-2